
🏡 Pre-Tenancy Function Overview
The Pre-Tenancy function is used when an Applicant expresses interest in renting a Property. During this stage, references can be requested and verified. Once you're satisfied and ready to proceed, the Pre-Tenancy can be converted into a full Tenancy by right-clicking on the Pre-Tenancy record and selecting Change to Current Tenancy.
📋 Requirements
-
A Pre-Tenancy must be linked to both a Property and a Tenant
-
The Property must already exist in Acquaint before a Pre-Tenancy can be created
-
The Tenant can be added during the Pre-Tenancy setup process
🔄 What Happens When a Pre-Tenancy Is Created
-
An Accepted Offer is automatically generated against the property
-
The Property Status is updated to Under Offer
🚀 Accessing the Pre-Tenancy Function
You can quickly access the Pre-Tenancy setup via:
-
The New Items icon on the Main tab
-
The Property screen by clicking the Tenancies icon and selecting Pre-Tenancy from the Menu
-
The Tenancy List screen by selecting Pre-Tenancy from the Menu button
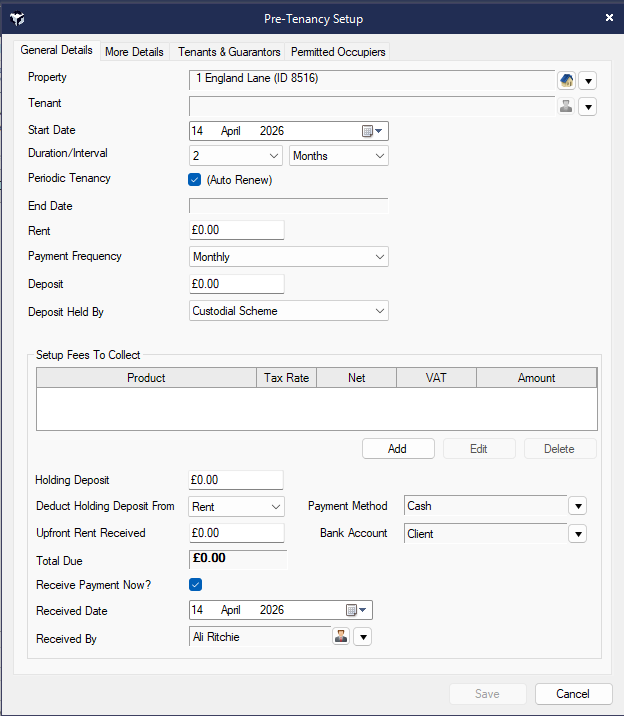
🏡 Pre-Tenancy Screen: Adding a Pre-Tenancy
Setting up a Pre-Tenancy allows you to record key details when an applicant expresses interest in a property. This step is essential for managing offers, referencing, and preparing for tenancy conversion.
For a visual walkthrough, Adding a Pre-Tenancy provides a helpful demonstration of the full process, including where to input each field and how to navigate the interface.
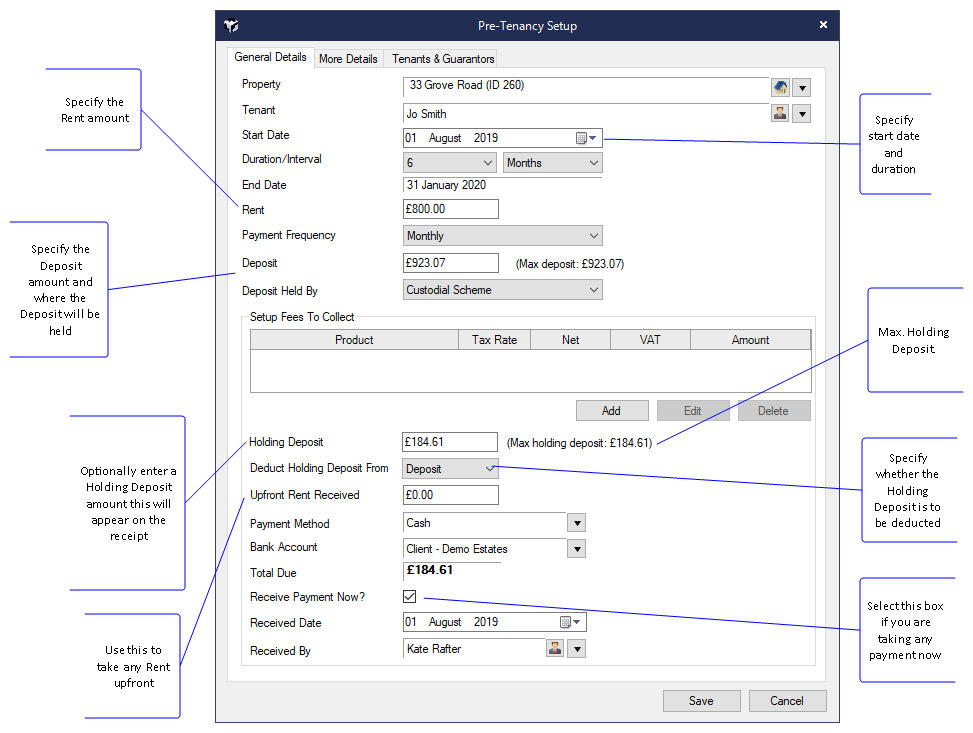
🔹 General Details Tab
Enter the following information:
-
Property – Select the property being let
-
Tenant – Choose an existing contact or add a new one
-
Start Date – Proposed tenancy start date
-
Duration/Interval – Length of tenancy and rent interval
-
Rent – Monthly or weekly rent amount
-
Payment Frequency – How often rent will be paid
-
Deposit – Enter the deposit amount
-
⚠️ If the deposit exceeds the legal maximum, a warning message will appear: "The deposit amount is above the legal maximum deposit"
-
-
Deposit Held By – Choose from:
-
Deposit Account
-
Paid to Landlord
-
Custodial Scheme
-
-
Tenant Fees #1, #2, #3 – Set up any upfront fees being collected (where permitted)
-
Holding Deposit – Uses a Holding Product and appears on the receipt
-
The system will display the maximum allowable holding deposit
-
-
Upfront Rent Received – Record any rent paid in advance (logged as unallocated credit)
-
Payment Method – Specify how payment was made
-
Bank Account – Select the account (Client, Current, Deposit) to post fees and deposit
-
Total Due – Automatically calculated based on inputs
-
Received Date – Enter the date payment was received (can be backdated)
-
Received By – Select the user who processed the payment
🔹 More Details Tab
Additional options include:
-
Payment Frequency – Confirm how often rent will be paid
-
Payment Day – Specify the day of the week/month for rent collection
-
Offer Notes – Add notes related to the offer; these will appear in the Details Sent/Offers screen
-
Guarantor – Add guarantor details if applicable
📝 Finalising a Pre-Tenancy
Once all Pre-Tenancy details have been entered, click Save. You’ll be prompted with the option to produce a receipt for the tenant.
If you choose to print the receipt:
-
Acquaint will confirm that:
-
An offer has been added against the property
-
Any applicable fees have been posted to the tenant’s account
-
At this stage, the tenancy will be created with a status of Pre-Tenancy. You should now proceed with credit checks and reference verification before converting it to a Current Tenancy.
🏠 Property Status Update
Once the Pre-Tenancy is set up:
-
The Property Status will automatically change to Under Offer
-
You can proceed to set up the full tenancy immediately or return to it later
⚙️ System Defaults & Warnings
-
Payment Frequency will default to the property's price frequency
-
For properties listed as per night, the frequency will default to Weekly
-
-
A default holding deposit amount can be set via: File → Configuration → Financial → Products
-
If the Deposit or Holding Deposit exceeds the legal cap, a warning will appear: "The deposit amount is above the legal maximum deposit"
💷 Holding Deposit Rounding
-
By default, the maximum holding deposit is rounded to the nearest pound
-
To round to the nearest penny, update the setting via: File → Configuration → Site/Branch → Lettings → Deposit Rounding → Penny Round Down
🔧 Optional Configuration
A System Configuration setting allows you to set the default for: ‘Pre-Tenancy Set as Receiving Payment’ to No, if preferred
✏️ Editing a Pre-Tenancy Record
To edit a Pre-Tenancy, follow one of these methods:
-
From the Contact's record, click Tenancies, then right-click on the relevant Pre-Tenancy and select Edit
-
Alternatively, go to the Tenancy List, click the Menu button, and choose Edit Tenancy
🔧 Editable Sections
You can update key information under the following tabs:
-
General Details – tenancy start date, property info, rent terms, etc.
-
Tenants & Guarantors – tenant names, contact details, guarantor information
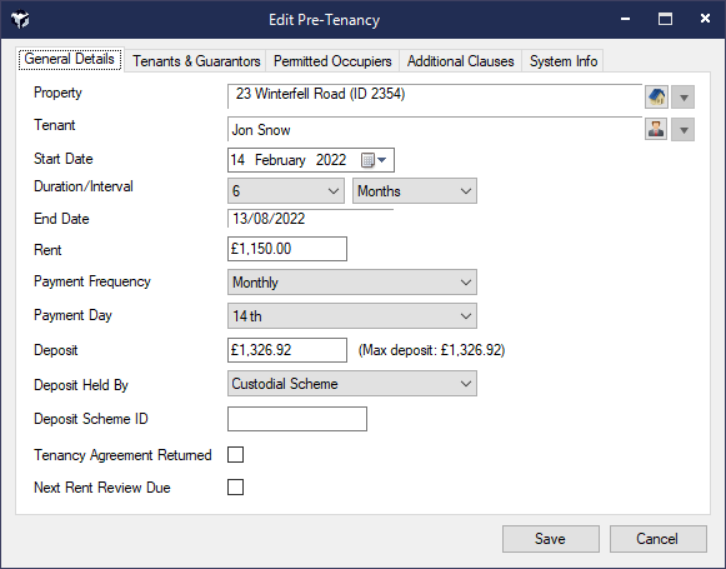
This screen does not allow you to change the contact or property the tenancy is linked to and doesn't create any transactions (either fees, upfront rent or holding deposit)
🔄 Pre-Tenancy: Next Steps – Cancel or Convert to Current Tenancy
From the Contact's record, click Tenancies, then right-click on the relevant Pre-Tenancy to proceed with one of the following actions:
❌ Cancel Tenancy
If references have failed or the tenant has decided not to proceed, you can cancel the tenancy:
-
Right-click on the Pre-Tenancy
-
Select Cancel Tenancy
✅ Change to Current Tenancy
If references have been approved and you're ready to move forward:
-
Right-click on the Pre-Tenancy
-
Select Change to Current Tenancy
ENGLAND ONLY:
After the Renters Rights Act released on May 1st 2026.
Changes to Tenancies
All existing current English Residential Tenancies will be automatically updated to be Periodic. - You will be able to see all updated tenancies from the “Tenancy List” button on the main tab at the top.
All new English Residential Tenancies will default to being Periodic during Setup.
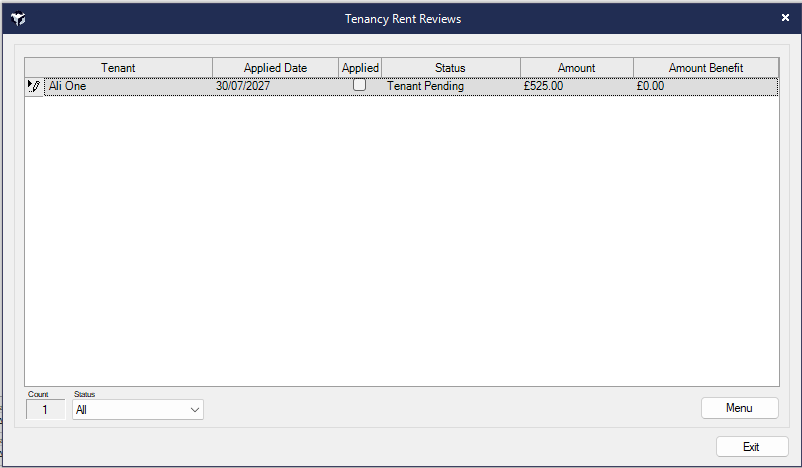
New Rent Review Management Module
We have created a brand new module to help you manage Rent Reviews. This will generate batch emails/SMS messages to Tenants and Landlords with details of a proposed increase.
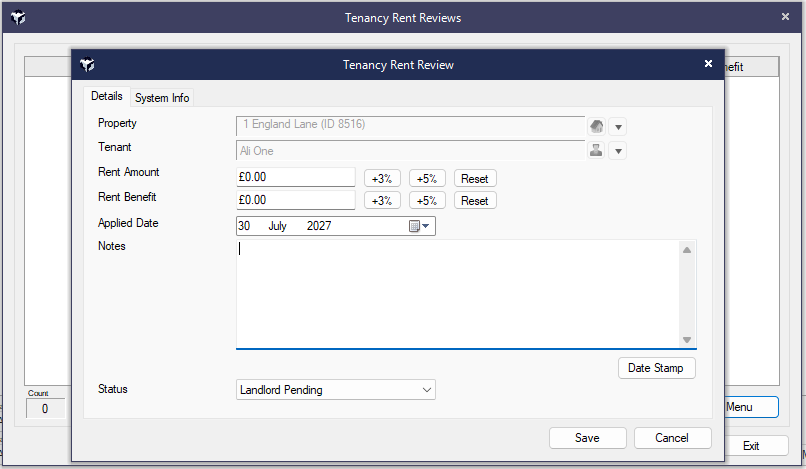
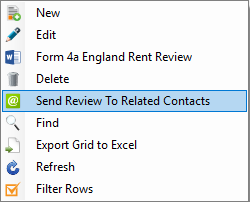
Using the Send Review to Related Contacts will allow you to send the Tenancy Rent Review Email, This will inform either the Tenant and/or Landlord depending on your choices.
Each Rent Review has work flow statuses with a full audit trail.
Acquaint will also produce the legally required "Form 4a" and populate it with the relevant landlord, tenant and property data.
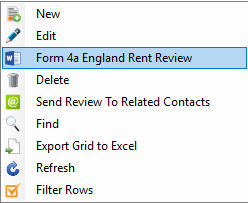
When you produce the Rent Review Form, you can easily amend any information, again this will look at the latest Rent Review and update accordingly when produced.
New Home Page Reminders have been created so the process can be easily monitored. (these will appear under the “Property Management tab”).
New Private Rented Sector (PRS) Database
Currently, the Government has not released significant information on the database, what the registration process will look like, or the duration of any registration. We do, however, expect that landlords will have to pay a fee, although it is unclear whether this will be per landlord or per property.
Within Acquaint, we plan to handle this with the creation of a new “Private Rented Sector Database” Certificate. Acquaints existing Certificate Management processes will then prompt you regarding landlords or properties that are missing this Certificate or need it renewed.