What is Signable?
Signable gets your documents signed fast! Instead of emailing or posting the document to the signer, it can be sent it out electronically via Signable and literally signed in a matter of minutes for a fraction of the cost. By using electronic signatures signers can sign on any device, quickly and easily whilst making sure the document is legally binding and secure.
Why use Signable electronic signature software?
-
Keep documents secure
-
Speed up your workflow
-
Recipients can sign on any device, anywhere, including a mobile device
-
Become more sustainable by wasting less paper
-
Branded signing emails
Signable and Acquaint
Acquaint integrates seamlessly with Signable making all elements of document production and signing a swift and smooth process. Use Acquaint to manage electronic online signing of documents such as tenancy agreements, forms and contracts.
The signing page can be branded with your company name, logo and colours.
Costs
Our Signable integration is on a Pay As Go service with no contract tie-in, prices can be found here.
Purchase credits online from the Help menu in Acquaint using the Purchase Signable E-Signature Credits option.
Credits are purchased in blocks and remain active until used. One credit equals one document. View Signable E-Signature Credits remaining by clicking on the System tab on the Home Page.
Sending reminders for documents that have been sent to Signable won't cost a credit. However, If a document is sent to Signable and subsequently cancelled will still be charged a credit.
How to set-up your MS Word templates to use Signable Merge Fields
See the Help on inserting Signable Merge Fields here.
Forms can be created using the Signable service, this enables the form to be completed electronically and returned electronically through Signable and imported back into Acquaint.
How to Send a document via Signable for E-Signing
-
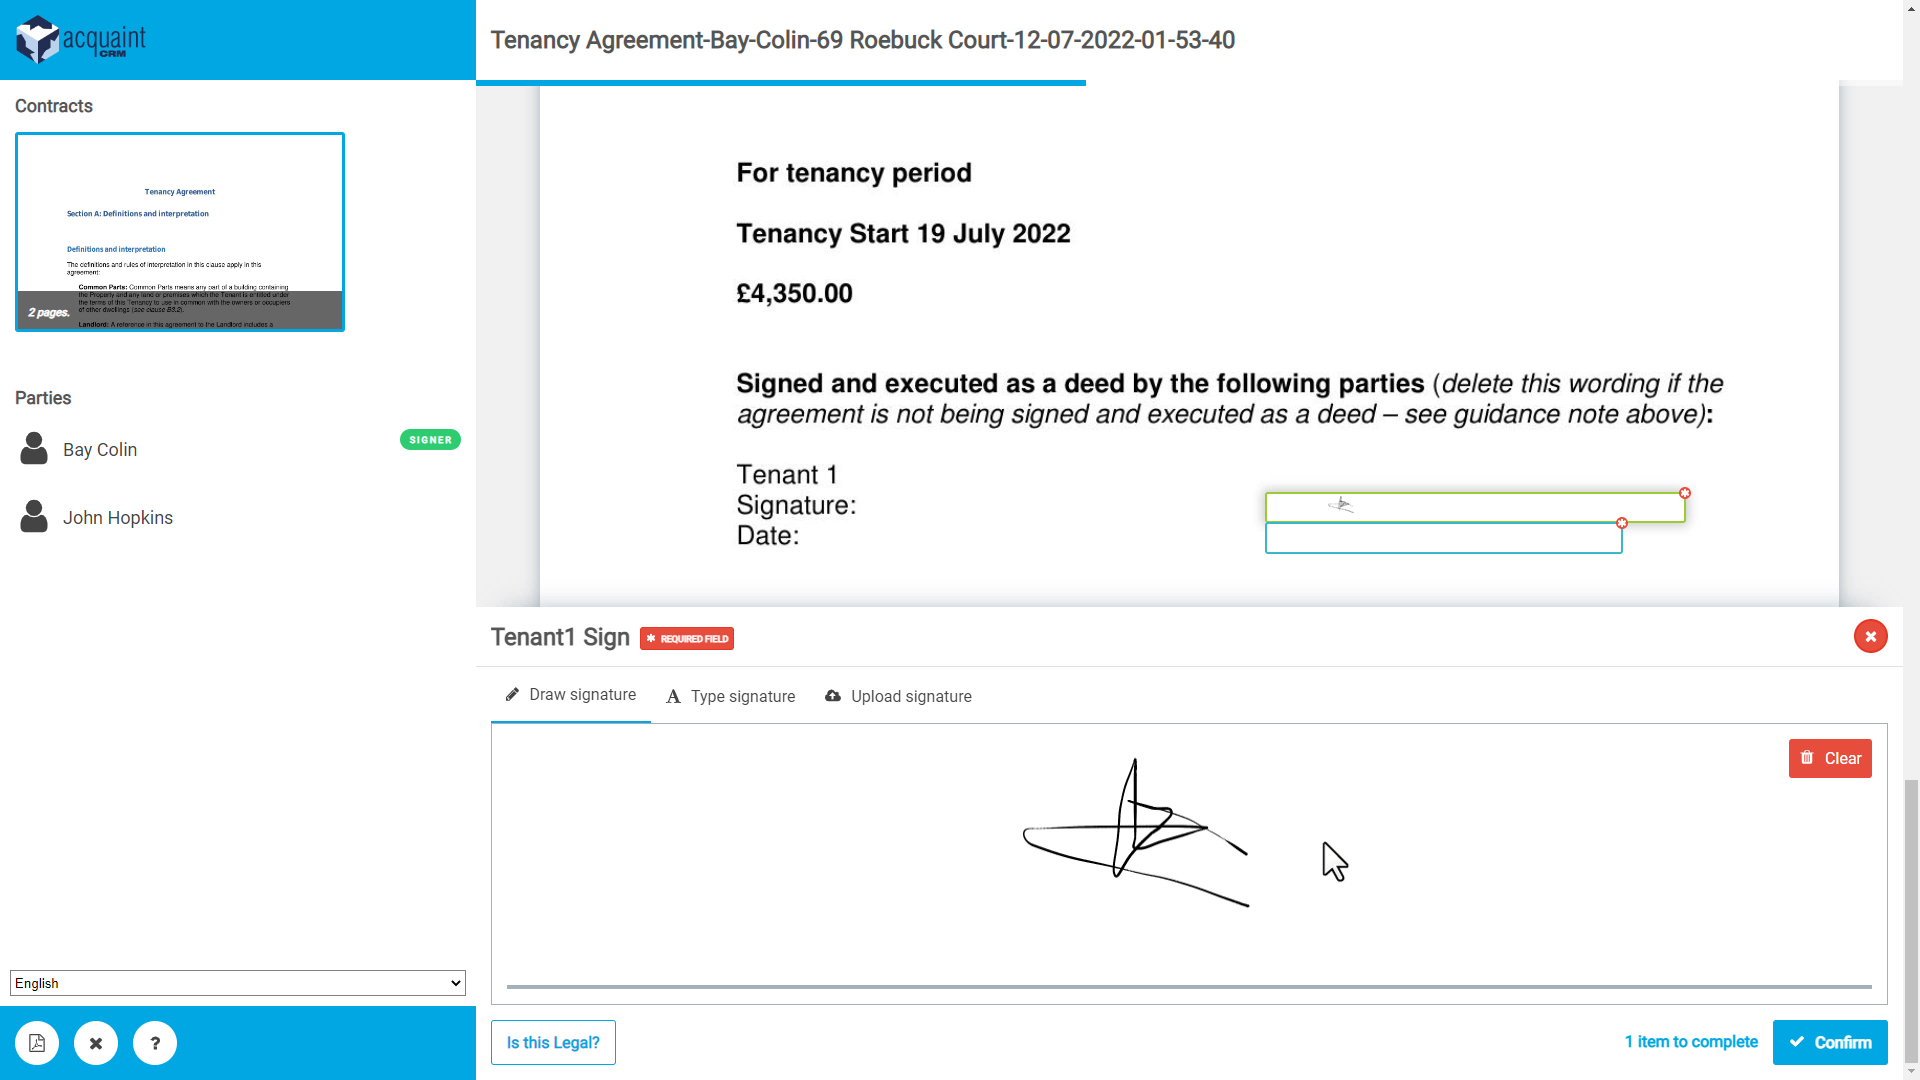
In Acquaint go to either the Contact or Property you wish to send the document to.
-
Click on the Letter button in the Correspondence group.
-
Select a Letter Template that has been set up with a Signable Merge Field.
-
Once the document has loaded in MS Word make any desired changes then save and close the document.
-
In the Correspondence screen for the Contact or Property right click on the newly created MS Word document and select Send to Signable from the menu. If no Signable merge fields were detected in the document a warning message will be displayed.
-
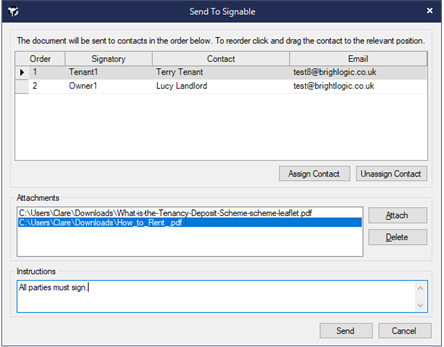
A Send To Signable screen will be displayed.
-
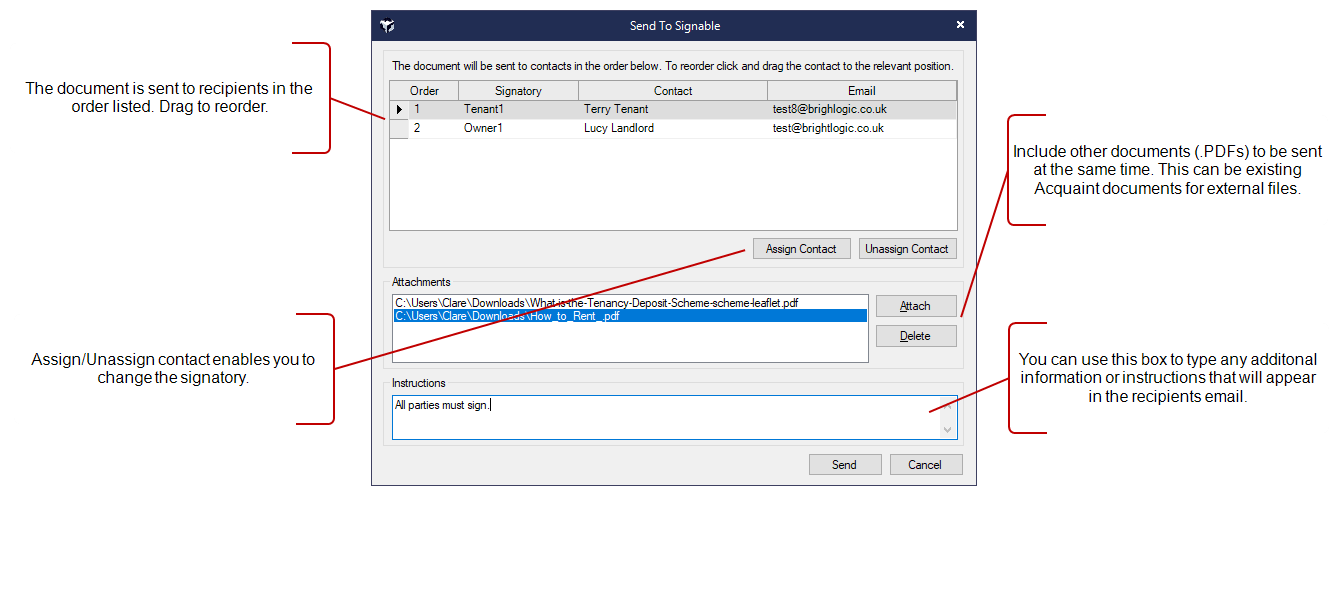
The screen intelligently assigns Contacts to the roles based on the Property and Contact linked to the document. The Assign Contact and Remove Contact buttons enable the signers to be changed as required.
-
Once all roles have been assigned to each Contact click the Send button. This will upload the document to Signable and email all Contacts (in order) that are required to sign the document.
-
The Contacts appear in the screen in the order they will be sent. To change the order click and drag the Contacts.
-
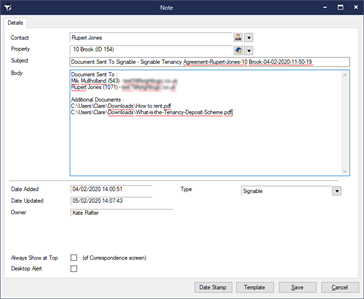
Attaching documents is useful for sending documents this allows you to include other documents to be sent at the same time as the Signable document for instance this could be the 'How to Rent Guide.pdf or your 'terms of business'. The Note created during the Send To Signable process will log a record of these documents being sent and will contain the Signable Fingerprint in the body text.
How the Signable Process Works
Step 1
-
The documents is sent to the two recipients in the order listed
-
The Attach button can be used to include any other documents (.PDF) to send in the Signable envelope
The example in the image above shows multiple signatories signing on document. In Signable Pay As You Go this would equal one credit.
Step 2
-
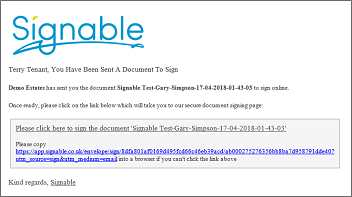
Emails are sent and the document signed in a round robin approach. Here the first recipient 'Terry Tenant' receives an email asking them to sign.
Step 3
-
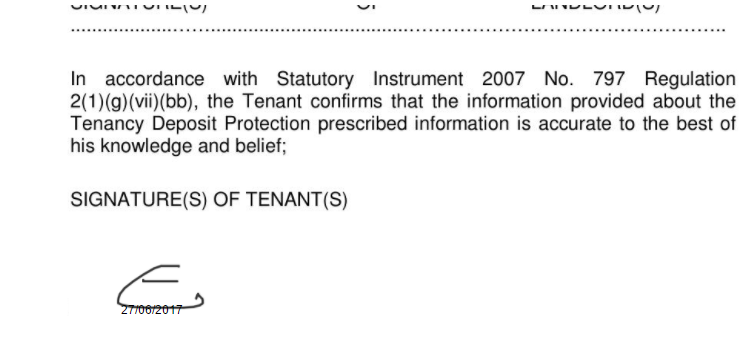
'Terry Tenant' signs document and submits it.
-
You (the agent) receives notification that 'Terry Tenant' has signed. Notification will also be provided when each subsequent recipient signs.
-
Signable sends an email to the next person 'Lucy Landlord' to sign.
-
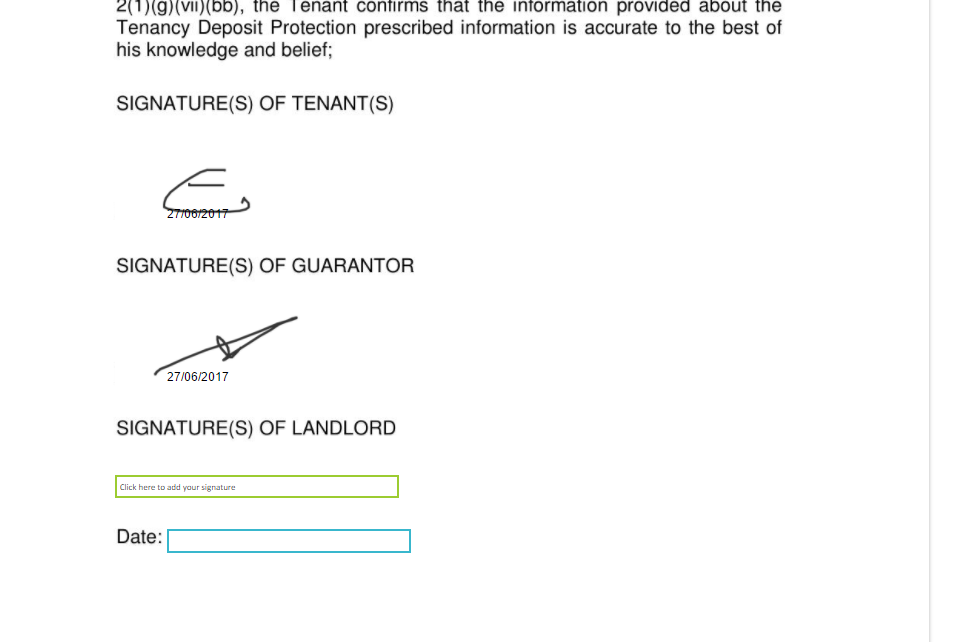
The parties can see the signatures of the previous party that have signed.
Step 4
-
Once all parties have signed the document,
-
Acquaint alerts you with a Desktop Alert.
-
Signable will send a full copy of the document signed by all parties to all recipients for their records.
-
Tracking your Signable Documents
Reminders
-
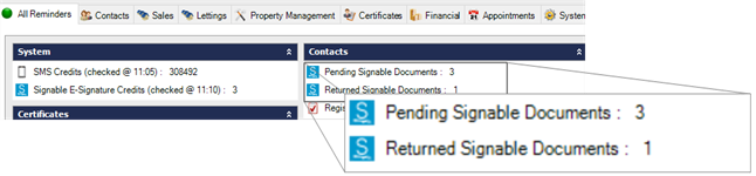
Home Page Reminders will be displayed for Pending Signable Documents.
-
To send a reminder click on the Pending Signable Documents reminder. Select the respective document, right-click and choose Send Reminder. Sending reminders for documents that have been sent to Signable doesn't deduct credits.
Progress / History
You can track the progress or view the history of an individual Signable document from the Pending Signable Home Page reminder by right clicking the document in the Pending Signable Documents list, and clicking "View Progress /History"
Automated Reminders
Acquaint will send automatic reminders can now be sent for Signable Document to remind the signer to sign their document. The reminder period is configured via File Configuration → System Configuration → Bespoke /3rd Party Links → Signable Automatic Reminder Email Period (Days) which can be set from 0-9 days (0 not sending a reminder at all).
Accepting Signable Documents
-
Acquaint will check every half an hour for Pending Signable Documents that require signing. Once a document has been signed it will be downloaded and a Desktop Alert will be displayed for the User that originally sent the document to Signable.
-
A Home Page Reminder will be displayed for any Signable documents that have been returned but haven’t been accepted.
-
Clicking on the Returned Signable Documents Home Page Reminder will allow users to optionally view and to accept the documents. Click Accept All and these documents will then be stored against the Contact and Property that the original document is stored against.
Signable Home Page Reminders
-
Signable tags can be removed from a Letter (in MS Word format) stored against a Contact. This will produce the document in a format that would make it suitable for printing. This can be accessed against a Contact record by going to Correspondence → Menu → Document Properties → Hide Signable Tags.
-
Documents that have been physically returned instead of digitally returned can be marked as signed by right clicking on the document and selecting Document Properties → Edit Details and selecting the Signed check box.
-
Report on signed documents from the reports screen using the Template - Signed report filter.
-
Use the Automated reminders to prompt signers to sign documents.
-
Extra information or signing instructions can added which will appear in the Signable email for recipients when they get a document to sign. This is added against a Letter Template via File->Configuration → Templates → Letter Templates and click Edit against the Template, a new Instructions text box will appear under the Advanced tab.
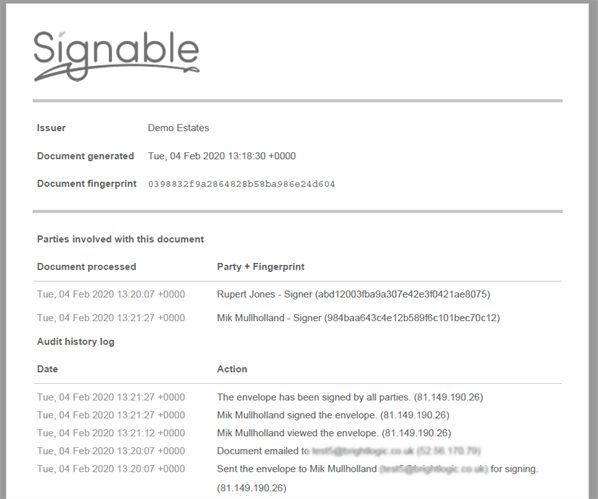
Signable will send a full copy of the document signed by all parties to all recipients for their records. The last page of the completed document will show a full audit history log of the document.