
🛠️ How to Raise a Work Order
Follow these steps to create and issue a Work Order:
1. Locate the Property
-
Navigate to the relevant Property record.
-
Click the Work Order icon.
-
Select New from the Menu button or by right-clicking within the Work Orders tab.
2. Enter Work Order Details
Fill in the required fields:
-
Contractor – Select the contact responsible for carrying out the work.
-
Property – Confirm the property where the work will take place. This will automatically populate useful details such as:
-
Account Balance
-
Management Type
-
Default Contact (Tenant/Landlord)
-
Tenancy End Date
-
-
Subject – Provide a brief summary of the issue.
-
Details – Add a description of the work required.
-
Added By – Automatically populated with your name; can be reassigned to another user.
-
Assigned To – Automatically populated; can be reassigned to another user.
-
Estimate – Optionally enter a cost estimate for the work.
-
Reference – Add a reference code or identifier.
-
Type – Specify the category of issue (e.g. heating, plumbing).
-
Due Date – Set the expected completion date.
-
Priority – Choose the urgency level.
-
Status – Select the appropriate status from the following options:
|
Status |
Description |
|
Estimate |
An estimate has been requested from the contractor. |
|
Pending |
Work Order raised but awaiting landlord approval. |
|
Outstanding |
Work has been assigned and is in progress. |
|
Completed |
Work is finished; awaiting contractor invoice. |
|
Closed & Billed |
Invoice received and processed (e.g. landlord funds deducted). See Bill Received screen. |
|
Archived |
Used for Work Orders that were raised but not actioned. |
-
Completed Date – Enter the date the work was completed.
3. Save the Work Order
-
Click Save to store the Work Order.
-
Or click Save & Close to store and exit the form.
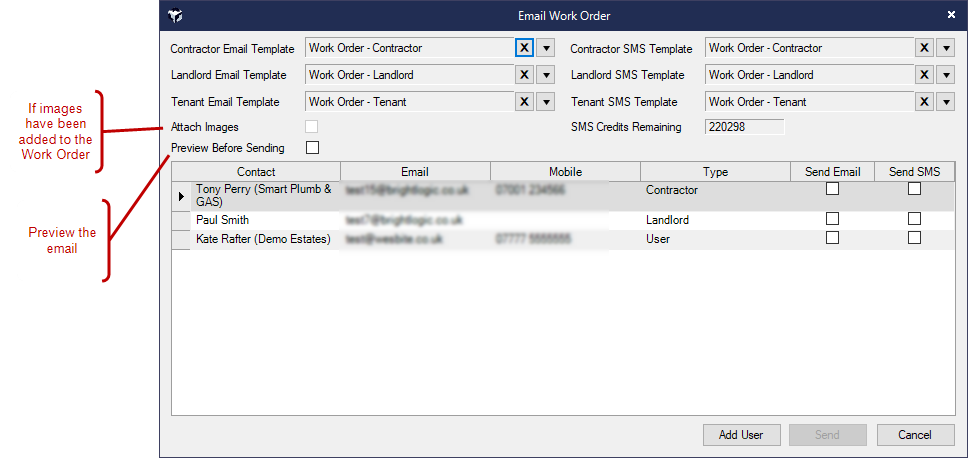
4. Send the Work Order
After saving, a prompt will appear asking if you’d like to email the Work Order to the contractor. You’ll also have the option to copy the landlord and tenant.
-
Click Yes to open the sending screen, select recipients, and click Send.
-
If you choose No, you can send it later by clicking the Send Work Order icon.
⚙️ Customising Work Orders and Communication
You can tailor the level of detail included in both the Work Order and the email sent to contractors, landlords, tenants, or other contacts.
📎 Attaching Work Orders to Emails
To control whether a PDF copy of the Work Order is attached when emailing landlords or tenants:
-
Go to File → Configuration → Site/Branch → Property Management
-
Adjust the setting: Attach PDF When Emailing Work Order to Landlord / Tenant
👤 Controlling Tenant Information Visibility
Tenant details included in the Work Order can be customised to suit your privacy preferences. By default, the Work Order displays the tenant’s Name, Telephone, and Email.
To change this:
-
Navigate to File → Configuration → Site/Branch → Property Management
-
Select your preferred option under Work Order Show Tenant Details:
|
Option |
Information Displayed |
|
Full |
Name, Telephone, Email |
|
Name and Telephone |
Name, Telephone |
|
Name |
Name only |
|
None |
No tenant details shown |
🆕 Raising a Work Order Without Selecting a Property
You can quickly create a Work Order without first locating the property:
-
Go to Main tab → New Items → Work Order
This Work Order can be billed later using the Bill Received icon.
🔍 Using Work Order References
Assigning a Work Order Reference makes it easier to locate the record later:
-
The Find screen includes a search option for Work Order Reference
🏠 Home Page Reminders
Reminders are automatically generated on the Home Page for each Work Order Status, helping you stay on top of outstanding tasks and deadlines.